
Personalise your gift giving with the help of Feast Watson
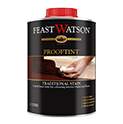
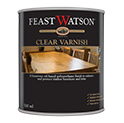
With gifts, it's the thought that counts. So why not show how thoughtful you are with a stunning DIY wooden gift hamper? Everyone loves a good, easy DIY - and trust us, it doesn't get easier than this! All you need is a wooden crate, Feast Watson Prooftint and Clear Varnish, and you've got yourself a beautiful, unique piece.
A gift hamper is the most beautiful way to bear gifts. Whether you pop in their favourite bottle of bubbles or a lovely scented candle, it'll look even better in a gorgeous crate! And because wooden crates are so versatile, it can even be used to elevate your picnic game, or as a mini bookshelf. Now, let's get DIY-ing!

Prepare your surface
Once you've chosen your wooden crate (we found this one from IKEA), start by sanding with 120 grit sandpaper. This will help smooth out any rough spots or splinters on the surface. Once you're done sanding, wipe away any dust with a cloth.
Apply Feast Watson Prooftint
Using a paintbrush, apply your desired Prooftint hue to the wooden crate. For best results, apply in the direction of the wood grain. Depending on the depth of colour desired, wait 2-5 minutes, then wipe off any excess. Allow to dry for 30 minutes before applying a second coat, if required.


Seal with Feast Watson Clear Varnish
Wait for 30 minutes until Prooftint has dried, then you're ready to seal the deal with Clear Varnish, making sure to stir thoroughly with a flat blade stirrer both before and during application.
Using a brush, apply a thin layer of Clear Varnish to the wooden crate. This will seal and protect the timber. Wait 8 hours before applying your second coat, and don’t forget to re-stir before the second application.
It's that easy!
Your wooden crate has now transformed into a fabulous hamper ready for any occasion!
This DIY hamper is the gift for gifts. Not only is it super easy, but it shows you took that extra step to impress.

What you'll need