Update your laundry with Timber Floor Paint
Update your laundry with Timber Floor Paint
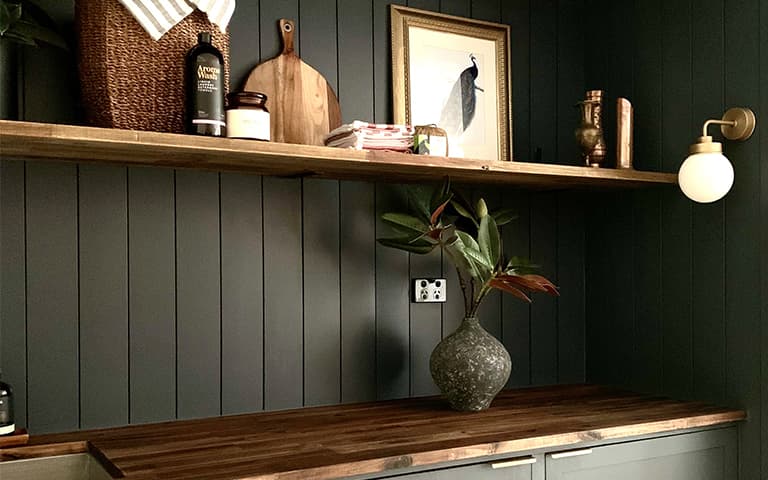
Timber panelling is a great way to convert an ordinary laundry into a style piece. Here’s how to ReLove your laundry by adding an on-trend wood panel feature wall with Feast Watson’s rich and opulent Charcoal Edge Timber Floor Paint.
What you'll need

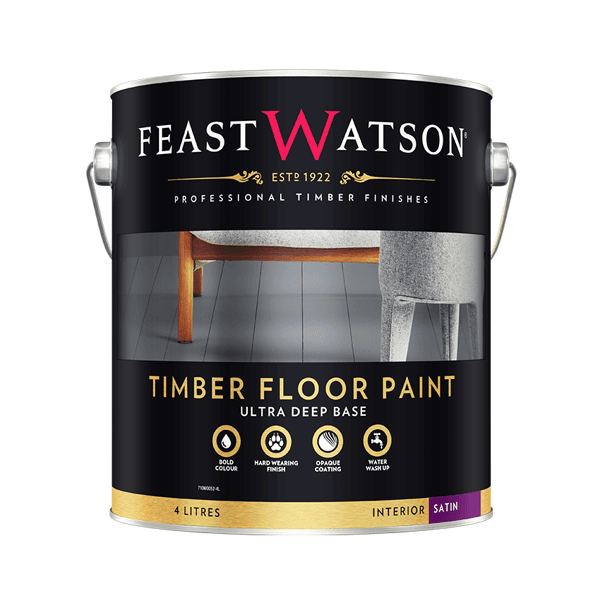
Feast Watson Timber Floor Paint
Size
4L
Qty
1


Paint Brush


Roller tray
Stirrer
Nails
Hammer
Paint Roller (Short Nap - Mohair)
Protective clothing
Nail gun
Timber panelling to install (ask your local hardware store to help you with options and/or to cut this to size for you)
Step One: Snap it!
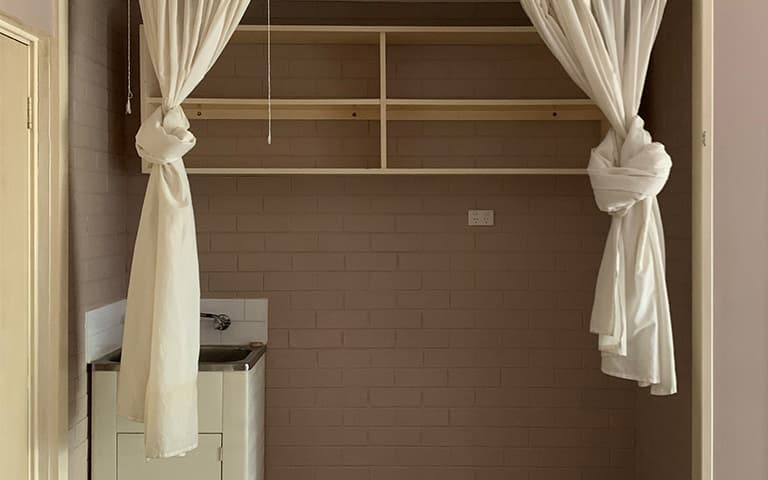
This is going to be quite the transformation, so make sure you document the process — starting with a before photo to compare to when the project is completed.

Step Two: Prep it
As with all painting projects, taking the time to properly prepare the space is key to a great outcome. Remove all fittings and fixtures from the wall and cover any furniture and flooring to protect it.
You may need to get a plumber or electrician to help remove your laundry fixtures and fittings. Keep any fixtures and fittings you want to re-use in the updated laundry.
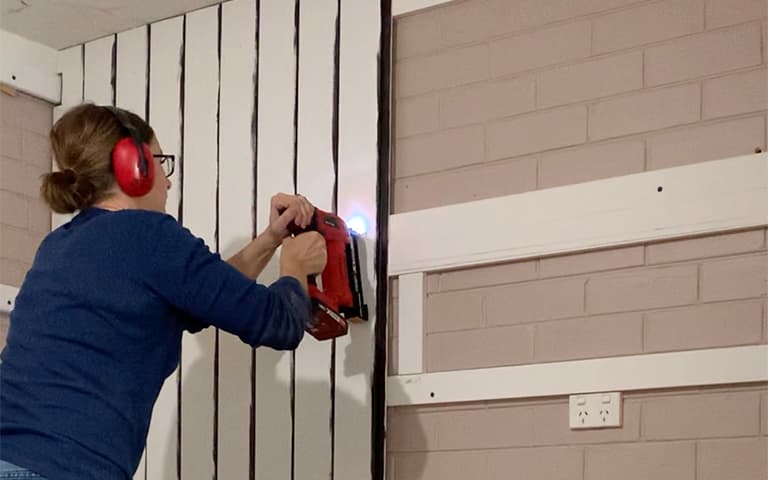
Step Three: Install it
Install the timber panels. There are various timber panelling options available at your hardware store. Installation requirements will be specific to the panels you have chosen, ask your local hardware expert for advice if needed.
It is best to start with bare timber for installation. If you already have existing timber panelling, you will need to sand it bare, removing any paint or varnish prior to painting.
Punch any exposed nails below the surface. Make sure any holes and imperfections in the timber are filled and sanded.
Give your panelling a wipe with a damp cloth to clean it.
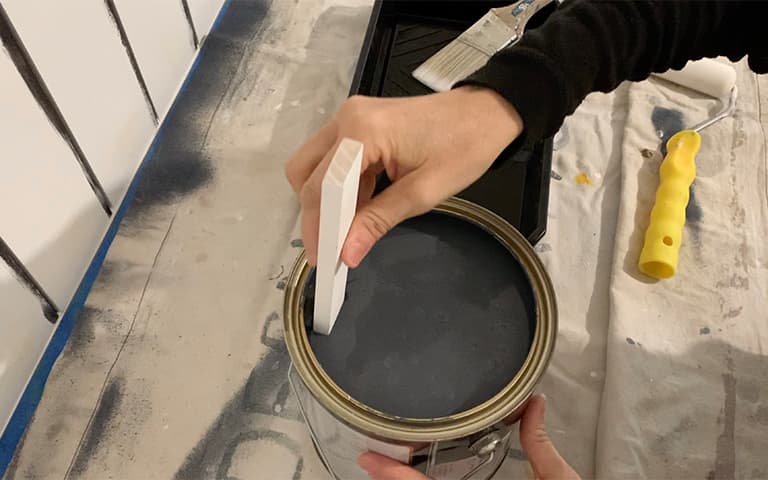
Step Four: Stir it
Stir your can of Timber Floor Paint thoroughly. Use a flat paddle stirrer, scrape the bottom of the can. Keep mixing until there are no chunks on the bottom and the colour is mixed through. Take care not to introduce bubbles.
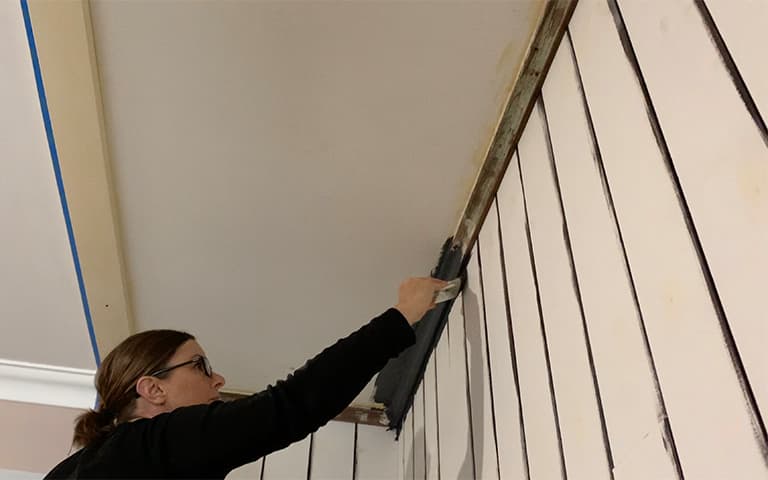
Step Five: Cut in
Dip a cutting brush into the Timber Floor Paint and cut in around your panelling, walls and any other surface you intend to paint (for example cabinetry). This will ensure you get clean edges. Make sure you also paint between each panel.
TIP: Use masking tape around your edges to ensure you get clean lines.
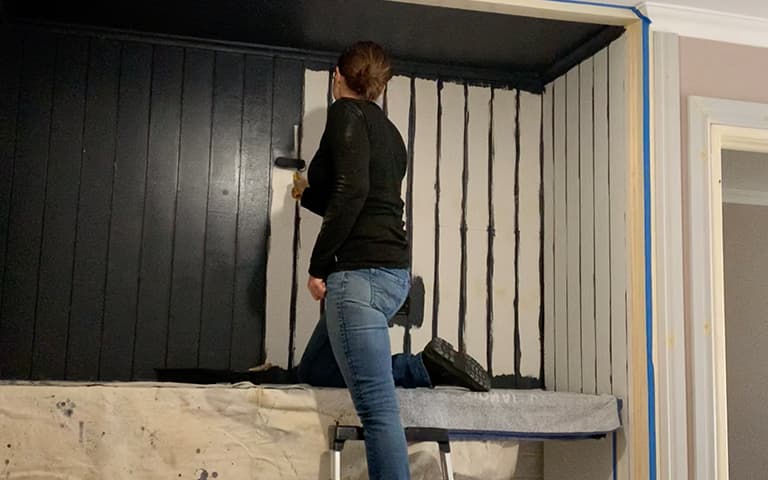
Step Six: Roll it
Pour the Timber Floor Paint into a roller tray. Using a roller with a mohair nap, roll the paint onto the wall 2-3 boards at a time.
Timber Floor Paint is designed to be recoated within 2 to 3 hours, so there’s no need to rush to paint the whole wall at once. It’s best to cut in and paint just a few boards at a time. Maintain a wet edge to prevent lap marks.
To get the best finish, tip off with a dry brush by running your brush gently across the surface. Pay particular attention to the gaps in the panelling and aim for a smooth and even finish. Completing this step slowly and carefully will make a big difference to your finished look.
Let it dry. It will take about 2 to 3 hours to dry enough for a recoat. Touch the surface in an inconspicuous area to feel if it is fully dry before reapplying further coats. For best results apply 3 coats to get that deep Charcoal Edge colour.
Step Seven: Don’t forget!
Use the same cut in and roller method to paint any cabinetry or surrounding areas to match.

Step Eight: Style it
Once everything is completely dry (this will take anywhere between 24-72 hours) you can reinstall existing or new cabinetry, fixtures, fittings and appliances. Again, you may need your plumber or electrician to help out here.
Style your updated laundry any way you like, the opulence of Charcoal Edge is beautifully complimented with copper fixtures, bright accents and pops of natural greenery.

Snap it again
Don’t forget to take a photo of the finished look so you can compare it to before. You’ll see a huge transformation as a result of the panelling and repainting.
Maintain your new panel wall by wiping your wall clean with a damp cloth from time to time. You can also recoat the panelling any time you feel like an update or refresh.